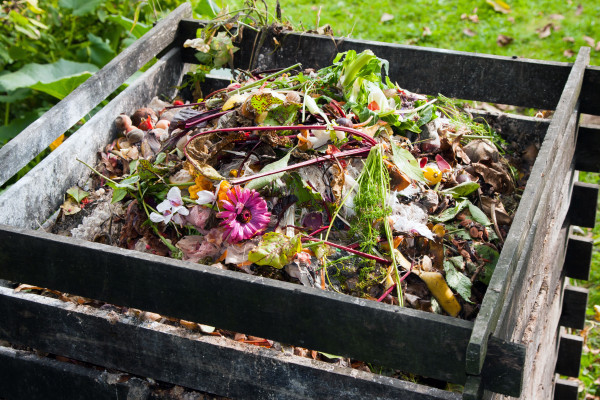
Get composting today using my handy compost guide. Soon you could be producing free plant fertiliser from your own kitchen and garden waste!
Compost is nutrient-rich material that can transform your soil and give plants a dramatic boost. It is created from decomposed organic matter, with help from bacteria, fungus, insects as well as other organisms.
Making your own compost is an easy, inexpensive and low-maintenance gardening project too. Homemade compost is also great for the environment, because it sends less waste to landfill.
Guide to choosing a compost bin
Start by choosing the right compost bin for you.
Considerations
You need to consider:
- how much space you have?
- how much garden and household waste you have? and;
- what your budget is?
Make sure you pick a suitable spot in the garden for a compost heap. Firstly, will need to be somewhere sunny or partially shaded. Then, preferably on a soil or grass base as this will encourage worms which will speed up the composting process.
Wooden bins
These traditional bins are square-shaped with no lids. The slatted sides ensure air gets into the compost and the open top makes it easy to turn the compost heap, which can speed up the process.
Remember
However, you need to cover the top to keep the rain out, usually with tarpaulin or an old piece of carpet. And the main disadvantage is that you have to leave the entire pile to compost down before you can use any of it. If you have the space, it’s best to have two of these bins together so you have one that’s ready to use and one to add new material to.

Plastic bins
Plastic compost bins are usually cylindrical and come with a lid.
The main advantage of these bins is that you can keep adding waste to the top and digging finished compost out of the bottom.
Think about
However, plastic bins can be slower to produce good compost because they are smaller and it’s difficult to turn the compost.
You need to ensure the right ratios of material go in.

Tumblers
Tumblers are rotating cylinders on a frame that can be turned to effectively mix the compost materials. This can speed up the process to give you finished compost in a much shorter timeframe. Simply fill the tumbler and then turn the drum every day or so for three months to aerate the compost.
Patience is key
However, once the bin is full and the composting process starts, you won’t be able to add to it again. Tumblers are also small-scale composters and lack the added nutrition from worm and insect activity. But they are a good space-saving choice.

Make your own compost
It’s important to put in the correct mix of ingredients to get the best quality compost. The finished product should be dark brown in colour, have a crumbly texture and a slightly sweet, damp woodland smell.
Sludge
You need roughly equal proportions of green and brown waste, which will help to avoid ending up with a smelly heap of sludge.
Green materials
Rich in nitrogen, quick to rot and have a high moisture content.
• Annual weeds and nettles
• Veg peelings and banana skins
• Fruit peel and pulp
• Coffee grounds, tea leaves and bags
• Cut flowers
• Grass clippings
• Soft garden prunings
• Old houseplants/bedding plants
• Rhubarb leaves
• Natural wool/cotton fibres

Brown materials
Rich in carbon, slow to rot and have a good, high fibre content.
• Dry leaves
• Shredded cardboard and paper
• Eggboxes
• Shredded hedge trimmings and wood chips
• Dead plant stems
• Animal hair
• Straw
• Wood ash
• Crushed egg shells
• Vacuum cleaner contents

Never put in
• Meat and fish scraps
• Dairy products
• Bread
• Coal ash
• Cat litter
• Glossy magazine-type paper
• Weed seeds

How to make compost
STEP 1

STEP 2
It is important to alternate because it creates a good balance for the composting process, and reduces the need to turn the compost.
You can also add a sprinkling of existing garden soil on top of each layer – this will add the vital bacteria and fungus to start the breakdown.
STEP 3
STEP 4
STEP 5
Eventually, you can decide to stop adding ingredients and leave the heap to mature.
Or with a plastic bin, you can start to use the lower layers which have finished composting.
Compost is ready to use when it is deep brown, crumbly and sweet-smelling. If it still smells rotten, it’s not ready.
Composting problems
IF IT’S TOO WET/DRY
If it looks dry, add some water and turn again to mix. Check again in a week. If it looks wet, keep covered from rain, turn regularly to aerate and add more dry materials like straw, sawdust or shredded cardboard.


Very informative
Brilliant thanks for that
Very helpful, thank you.