I love container gardening because it allows you to put plants anywhere, even right by your front door. That’s especially important in spring, when the garden is still coming to life – I want see a bit of colour!
Planting containers with bright spring colour is sure to put a smile on your face. Flowers lift our mood and it’s exactly what we need in this damp, drab weather.
There are loads of plants to add a splash of spring colour to your garden. Here’s a few of my favourite spring flowers, plus a step-by-step tutorial on how to plant up stunning spring containers.
How to plant spring colour in containers
Step 1: Check the drainage
Good drainage is very important in container gardening. If water gets trapped in the plant pot, air can’t get to the plant’s roots and it may rot and die. The problem is even worse in spring, which is a typically wet time of year.
Most flower pots and containers should come with some drainage holes already in the bottom. But I always drill a few extra ones into plastic or wood containers, just to be safe.
Add a layer of gravel or broken pottery to the bottom of the container. This stops the drainage holes getting blocked by lumps of compost.
Half fill your container with general purpose compost, and you’re ready to plant!
Step 2 – Choose your plants
The best container gardens make use of larger containers with several plants in them. This helps create a mix of height, shape and colour for a stunning display.
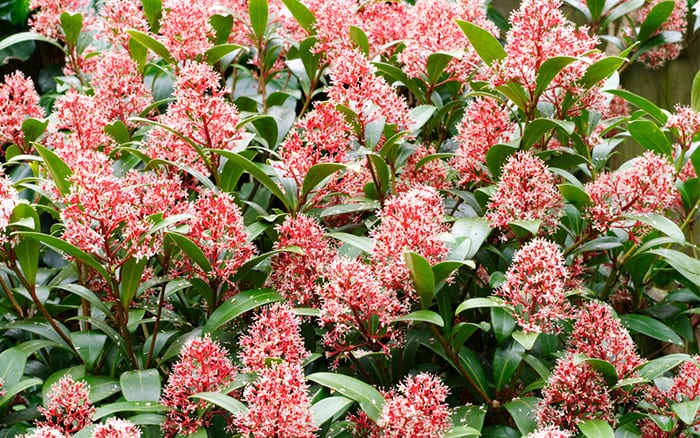
I always start with a centrepiece. This is usually a bigger feature plant that goes in the middle. In the video above, I’m using a Skimmia.
Great spring centrepieces
- Skimmia japonica
- Dwarf conifer (Cupressus Goldcrest is good)
- Hebe
- Osmanthus burkwoodii
- Viburnum
- Tall spring bulbs like daffodils and tulips
Around the centrepiece you need lower-growing, colourful bedding plants and flowerings varieties. In the video I use a selection of primroses, which have a vivid flower colour and nice leafy foliage.
Best plants for spring colour
- Primroses
- Pansies
- Spring bulbs like crocus and dwarf iris
- Ornamental cabbages
- Polyanthus
You can also add trailing plants like ivy around the edges to drape down the sides of the container.
Want more inspiration? Check out these unusual container ideas.
Step 3 – Plant your container
Start with the large centrepiece. Carefully take off the pot and place the plant in the middle of the container. Nestle it into the compost so it sits straight and fill in with compost to hold it in place.
Next make small holes in compost around the edges where the bedding plants will go. Remove them from their pots and plant them as you did with the centrepiece.
Aim to make the container feel full and lush – nothing looks sadder than a half-empty flower pot. Firm in the soil to hold the plants in place and top-up with more compost if there are any gaps.
Try to get the final compost level a couple of centimetres below the rim of the pot. If you fill the container right to the top, compost will spill out when you try and water it. Now give the container a good water.
Step 4 – Where to put your spring container
Make the most of your spring containers by putting them somewhere you can see them clearly. This may be by the front door or on the patio near the kitchen window.
If you place your container against the side of the house you might need to give it a bit of extra water. This is because it will sit under the eaves and won’t get as much rainfall.
You can also lift pots up onto pot feet to help drainage. I use old wine corks!
Your stunning spring container should give you months of pleasure. Make sure to refresh it when the bedding plants start to die with some summer-flowering varieties like fuchsias and geraniums.


Leave A Comment